Affiliate Links & Product Reviews
Two plugins work together here. Affiliate Links owns your programs and your links: it knows which store you work with and which tag you carry there, gives every link a clean /go/ address, counts clicks and adds the rel="sponsored" Google asks for on paid links. Product Reviews turns a post into a review page with a score, pros and cons, a spec table and buy buttons. When both are on, the buy buttons go through Affiliate Links, so one tag definition covers everything.
Both are switched on from Plugins. Affiliate Links works on its own; Product Reviews works on its own too, but only gets tagged, click-counted buttons when Affiliate Links is on.
Step 1 - Define your program
Open Affiliate Links in the admin. The first card is Affiliate programs. A program is three things: the store domain, how the tag is attached, and the tag itself.
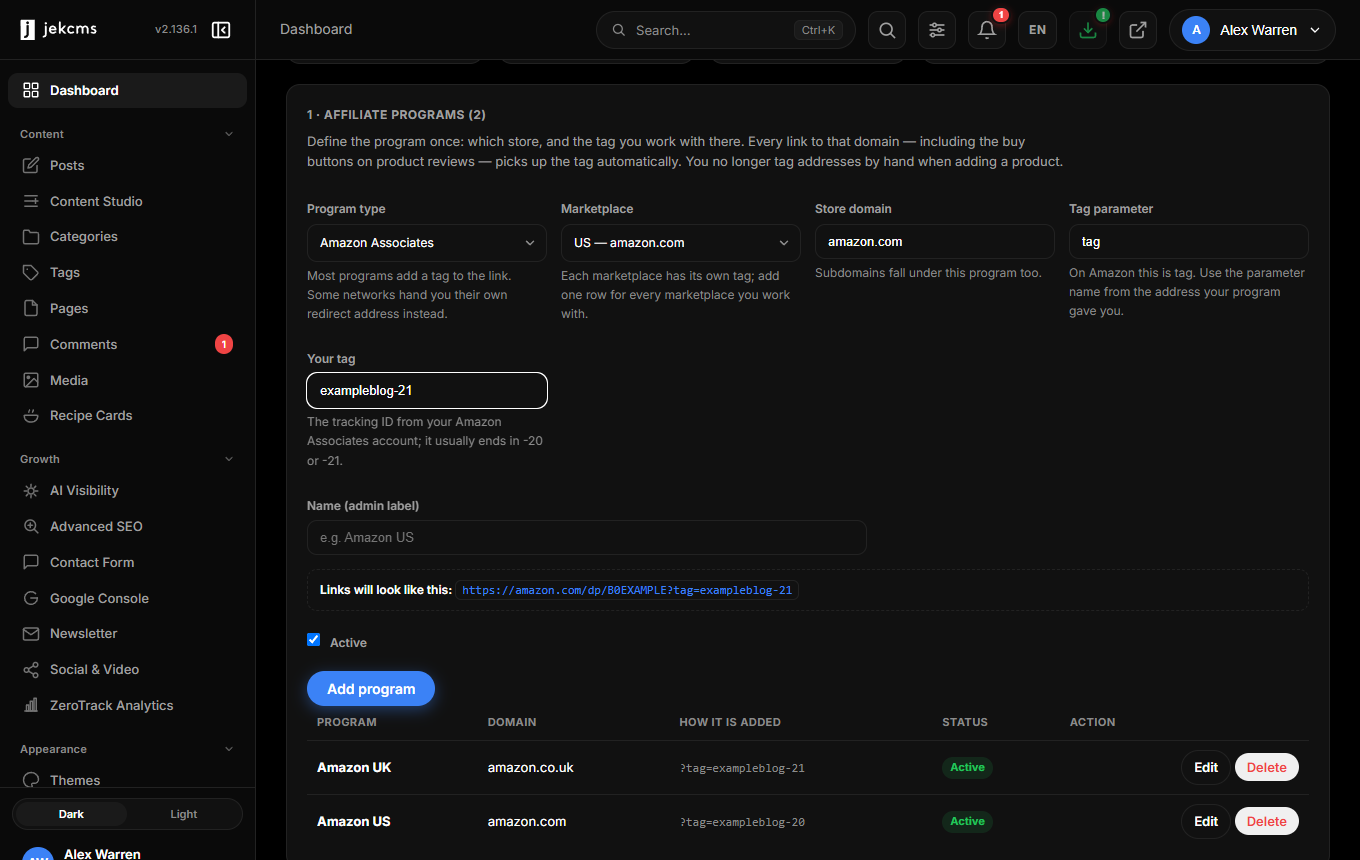
- Amazon Associates. Pick the marketplace (amazon.com, amazon.co.uk, amazon.de and so on), paste the tracking ID from your Associates account (it usually ends in
-20or-21) and save. Each marketplace has its own tag, so add one row per marketplace you are approved for. - Another program that adds a tag to the link. Type the store domain, the parameter name the program gave you (for Amazon it is
tag) and your tag or partner ID. - A network that gives you a redirect address. Some networks hand you a tracking URL and expect the product address inside it. Paste that address and write
{url}where the product address belongs. jekcms encodes the product address into that spot.
As you type, a line under the form shows exactly how a link will go out, so you can check the result before saving. Subdomains fall under the program too: a link to m.example-store.com matches a program for example-store.com.
One program per domain. If you try to add a second one for the same domain jekcms refuses, because two tags for one store would leave it unclear which one wins.
Step 2 - Add links, or just paste store addresses
You do not need to tag addresses yourself any more. Wherever a link to a store domain appears, the program's tag is added for you:
- Links you add on the Affiliate Links screen. Paste the plain product address as the target. The form tells you whether it matched a program and where the visitor will actually be sent. The tag is applied at the moment of redirect, so changing the tag later updates every link at once.
- Plain store links inside a post. A raw link to a program's domain inside your content gets the tag and
rel="sponsored"when the page renders. - Buy buttons on product reviews. Enter the plain store address on the product; the button carries the tag.
Every link gets a clean address of the form /go/your-slug. Use [aff your-slug] inside a post to drop a tracked link, or [aff your-slug]custom text[/aff] for your own anchor text. You can also link straight to the /go/ address from anywhere.
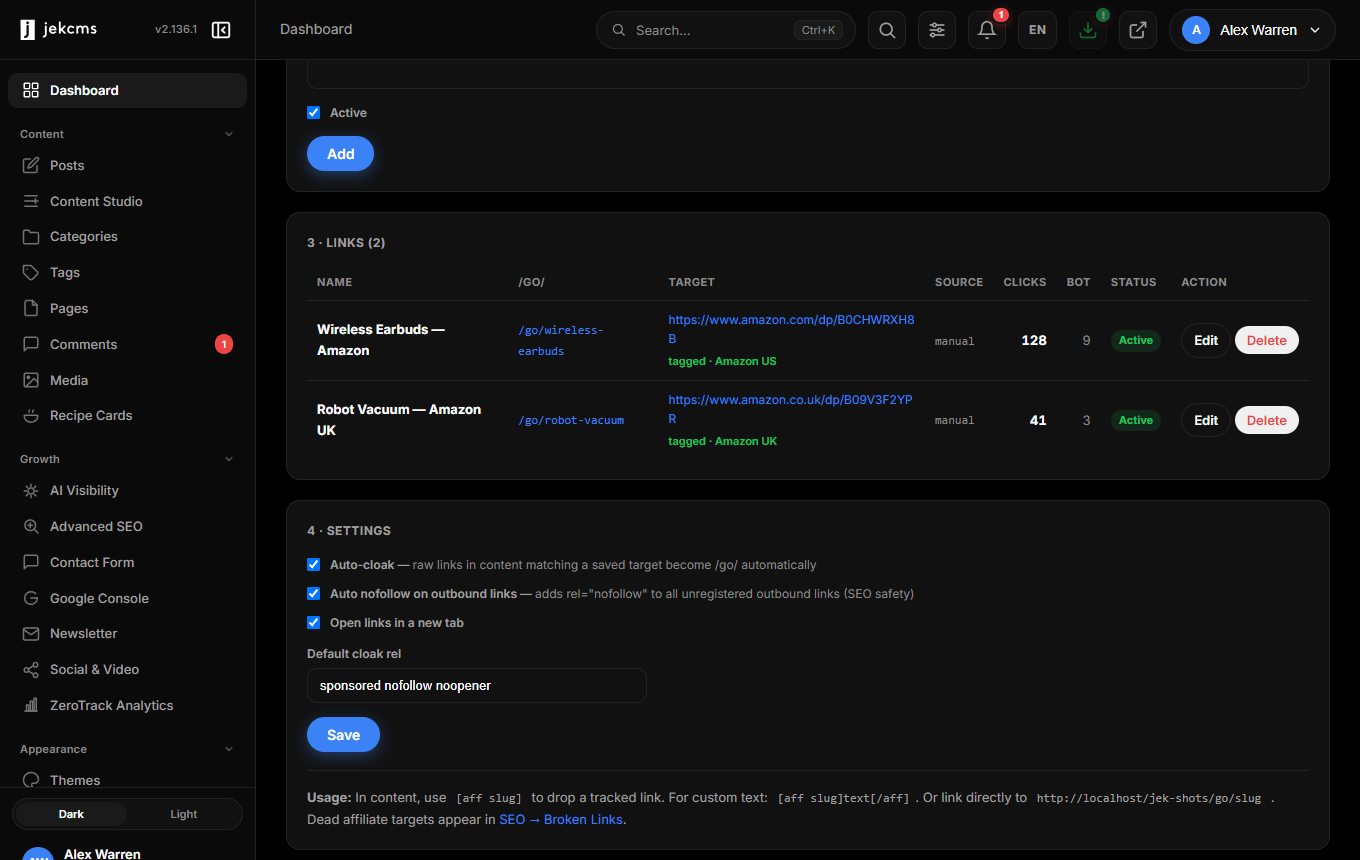
The link list shows where each link came from: added by hand, created from a product review (with a link to that product), or left over from a product that has since been deleted. Tagged links are marked with the program they match.
Step 3 - Read the clicks
The top of the Affiliate Links screen shows total human clicks, active links and a thirty-day trend. Each link row shows human and bot clicks separately; obvious crawlers and the same visitor hammering one link are counted as bot traffic and kept out of the human total. No IP addresses are stored.
Redirects are temporary (302 or 307) on purpose. A permanent redirect would be cached by browsers and networks, clicks would stop being counted and repointing a link would stop working.
Dead targets show up under SEO → Broken Links, because every affiliate target is watched by the same link checker as the rest of your site.
Product reviews
With Product Reviews on, a product carries a name, brand, model, ASIN, score with breakdown, a one-line verdict, who it is for, pros and cons, key features, a spec table, an FAQ, badges and its stores. Link the product to a post and the review blocks appear in that post automatically; or place them yourself with short codes if you want a different order.
Stores are simple: pick the store, paste the plain address, optionally give the button its own text. The first store becomes the primary button. For Amazon, leaving the address empty and entering the ASIN is enough; the link is built from the ASIN and the marketplace tag.
Visitors from other countries. When switched on in the Product Reviews settings, a visitor from the UK is sent to amazon.co.uk and one from Germany to amazon.de, each counted with that marketplace's tag. This only happens for marketplaces you have defined a program for; a click sent to an untagged store earns nothing, so the link is left alone instead.
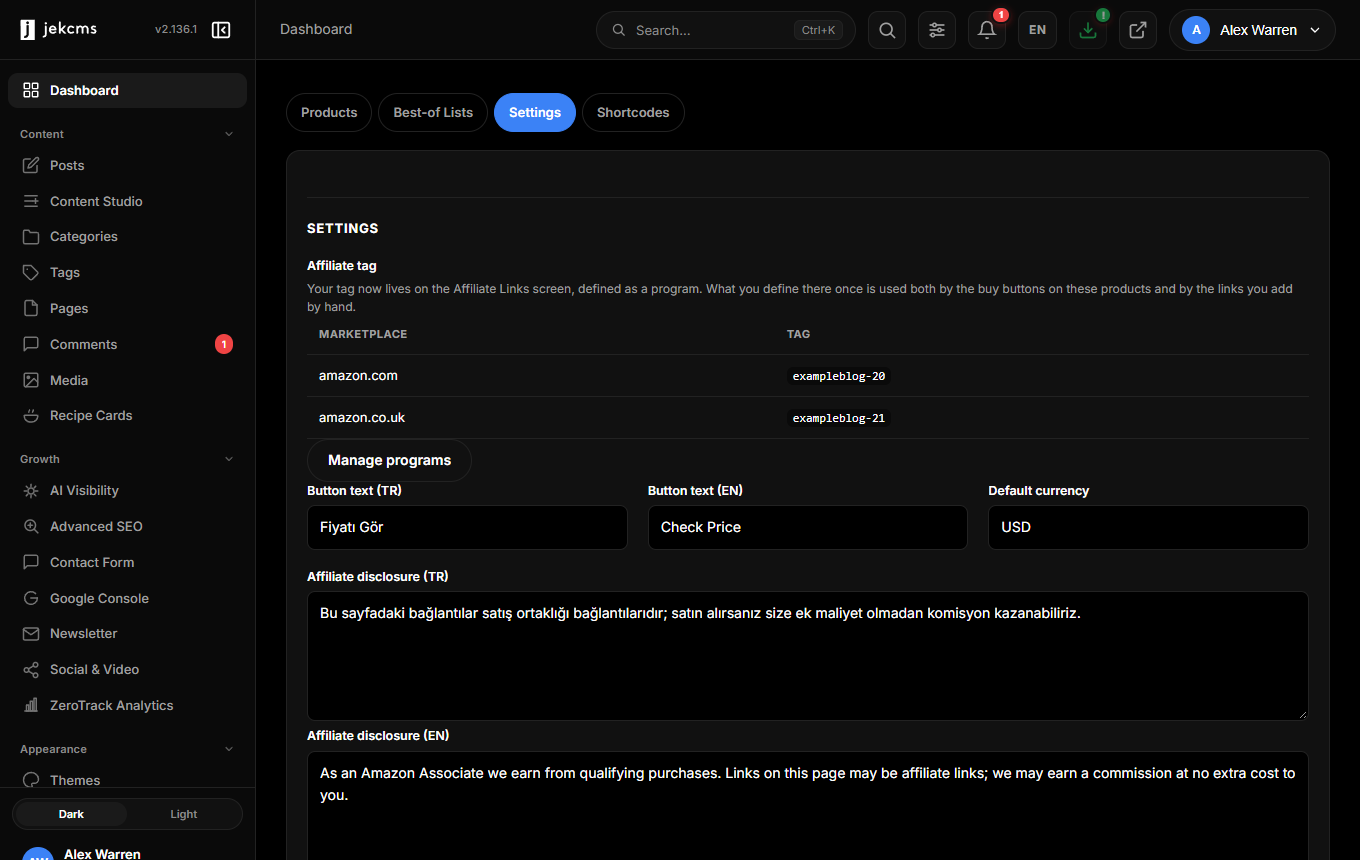
Where the tag lives. With Affiliate Links on, the Product Reviews settings no longer hold a tag field; they show the programs in use and link to the Affiliate Links screen. Tags entered before this change were moved into programs automatically, so nothing needs to be typed again.
Settings worth knowing
- Auto-cloak rewrites a raw link in your content to its
/go/address whenever the target matches a saved link, so old posts get click counting without editing. - Auto nofollow adds
rel="nofollow"to every unregistered outbound link, which keeps you on the right side of Google's paid-link guidance even for links you forgot about. - Open in a new tab applies to cloaked and outbound links.
- Default rel for cloaked links is
sponsored nofollow noopener; change it only if you know why.