Installation
jekcms ships as two files: jekcms-install.php (the setup wizard) and jekcms.zip (the core). No Composer, no Node, no build step. Upload both to your web root, open the wizard in a browser, and it handles the rest - extracting the core, writing your configuration, creating the database schema, and deleting itself when it's finished.
A typical fresh install takes under ten minutes.
Requirements
The wizard opens with a system check and tells you exactly where you stand. Required items block the install; recommended ones only produce a warning.
Required
- PHP 8.0 or newer
pdo_mysql- database connectivityzip- package extractionmbstring- multilingual text handling- A writable web root - the wizard tests this by actually writing a file, not by trusting
is_writable() jekcms.zippresent in the same folder as the wizard
Recommended
gd- image processing. Without it, image download and conversion won't work; the install still completes.curl(orallow_url_fopen) - needed to fetch remote images, which matters most for WordPress migrations.- 128 MB PHP memory limit, an 8 MB upload limit, and free disk space of roughly three times the zip size.
- AVIF support (
imageavif). Without it jekcms falls back to WebP.
You also need a MySQL 8.0+ / MariaDB 10.4+ database and, on Apache, mod_rewrite.
Most shared hosts advertising "PHP 8 + MySQL" satisfy all of this out of the box.
Before you start
- Download the package. Both files are in your customer portal under Downloads, gated by your license.
- Create an empty MySQL database in your hosting panel (cPanel, Plesk, DirectAdmin all have a "Create Database" wizard). Write down the database name, username, and password. Many hosts prefix the name with your account, e.g.
cpuser_jekcms- the full prefixed name is what you'll enter. - Upload
jekcms-install.phpandjekcms.zipto your web root - usuallypublic_html/. Put them side by side; the wizard looks for the zip next to itself.
You do not need to extract the zip yourself. The wizard does it.
Running the wizard
Open yoursite.com/jekcms-install.php in a browser. The wizard is bilingual - the toggle in the top-right switches between English and Turkish, and there's a light/dark switch beside it.
1. Choose how to start
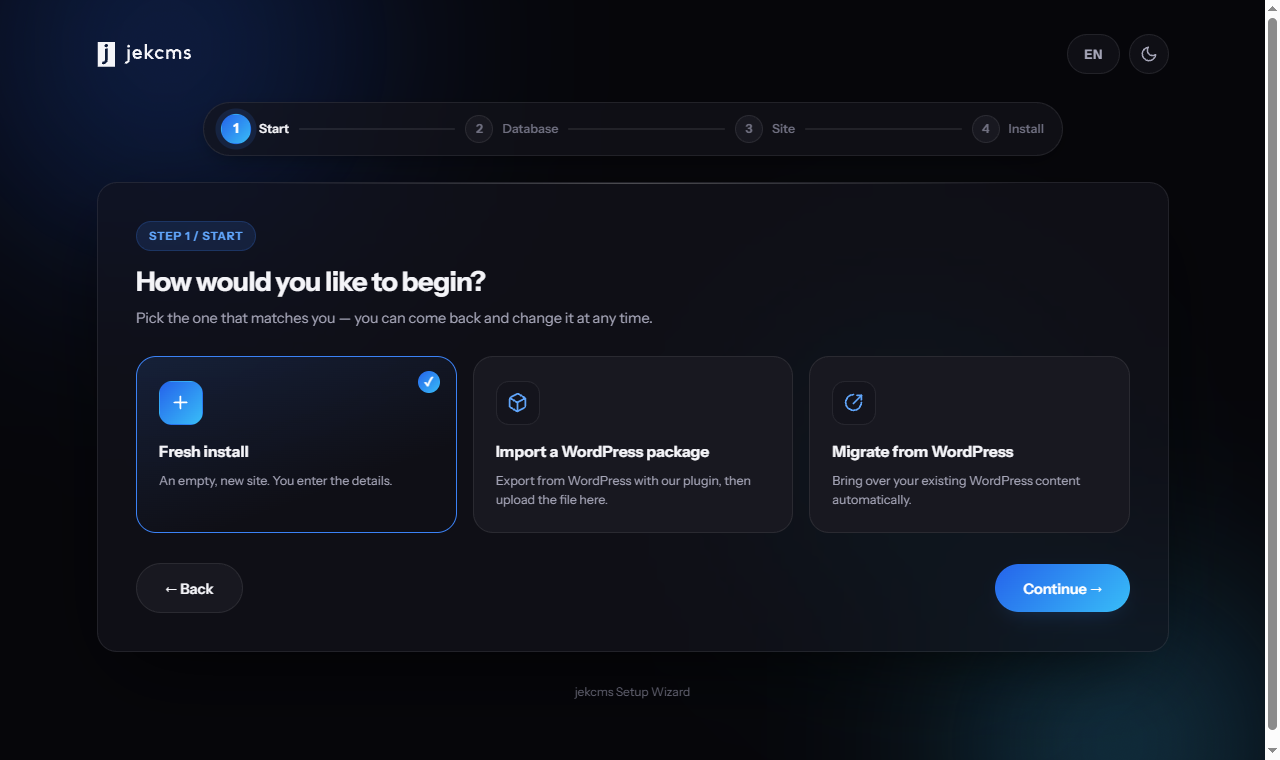
The wizard checks your server inside this step. A missing required item stops the install and names the extension, which is all your hosting support needs to enable it. Warnings are safe to continue past.
Then it asks how you want to begin. A fresh install gives you a clean site. Migrate from WordPress reads your existing WordPress database directly and brings posts, pages, categories, tags, comments, authors and media across - see WordPress Import for the full walkthrough.
2. Database
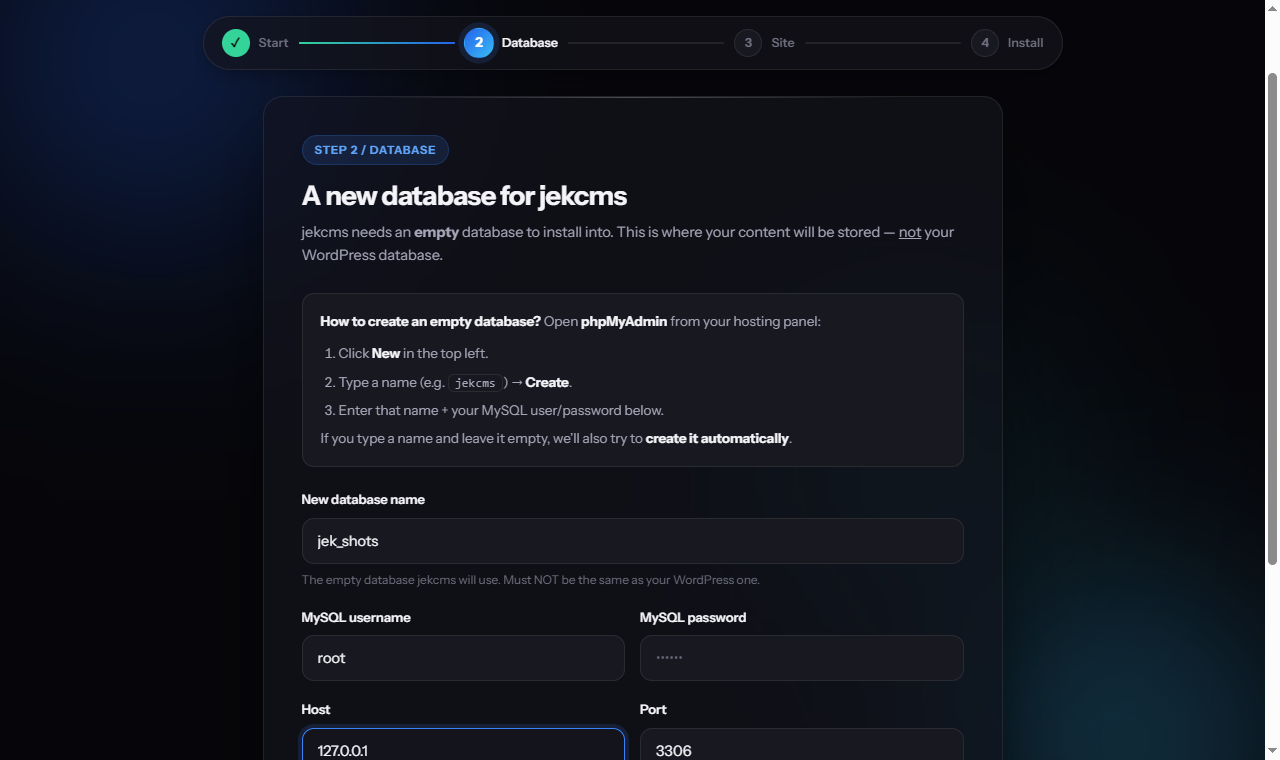
Enter the credentials for the empty database you created a moment ago. Host is almost always localhost and the port 3306; your hosting panel will say otherwise if it differs. Press Test connection - if the user has permission and the database does not exist yet the wizard creates it, and it will not let you continue until it has confirmed the database is reachable.
If you chose the WordPress scenario, the next screen asks for your WordPress database separately, along with its table prefix (usually wp_, but check the $table_prefix line in wp-config.php). Once connected you see live counts of the posts, pages, categories and comments that will be imported, with checkboxes for images and comments beside them.
3. Site and administrator
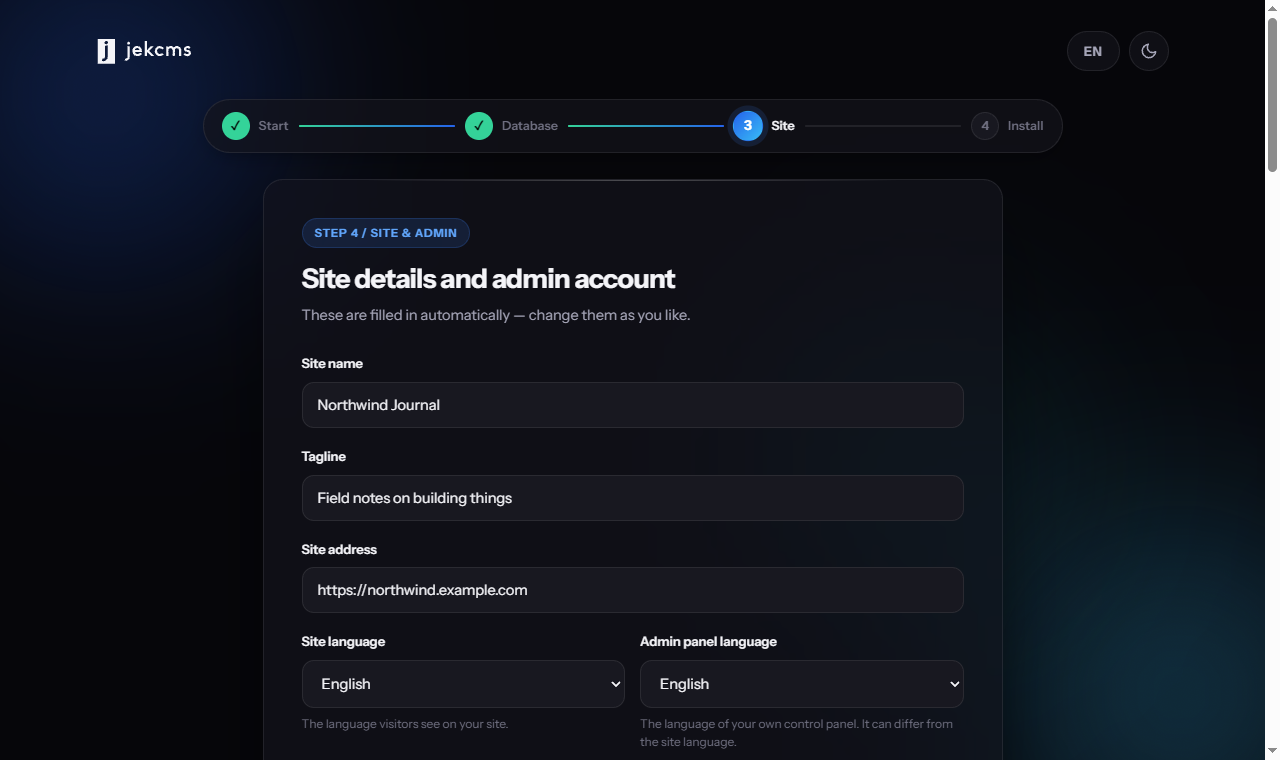
One screen collects everything the site needs to identify itself.
The site name and tagline build your SEO title - this is what Google reads as your brand. The site URL is your canonical address, so get the https:// and the presence or absence of www exactly right; SEO metadata and outgoing emails are generated from it. A logo can go in now as PNG, JPEG, SVG or WebP, or later under Settings → General. Pick any bundled theme; you can switch whenever you like from Appearance → Themes. The administrator account takes a name, an email and a password, and that email is where new-comment and support-ticket notifications go.
Start with sample content is on by default. It seeds three categories, nine short guide posts with cover images, tags and a main menu, so the theme you picked looks complete from the first minute. Those posts are marked noindex, and one click under Posts removes all of them. The option is hidden for WordPress migrations, where your real content takes over.
4. Install
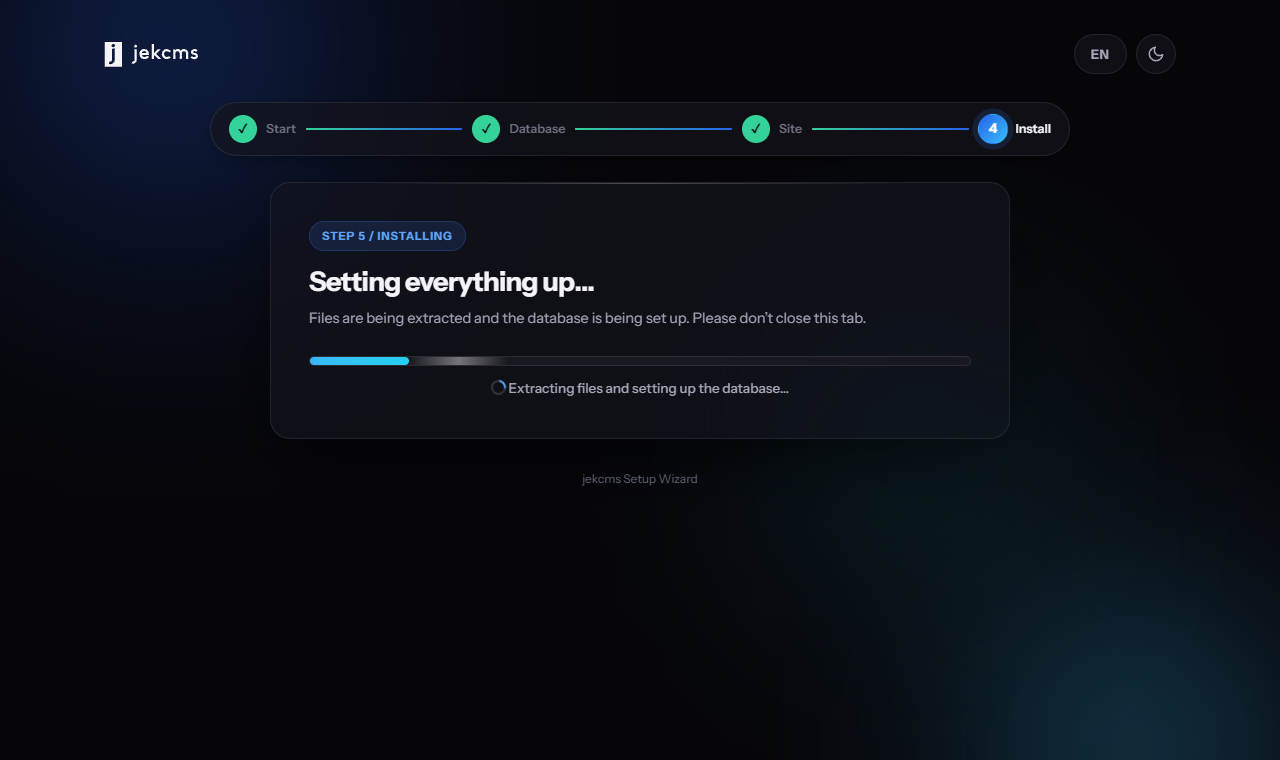
The wizard extracts the core, creates the writable folders it needs (cache, logs, temp, backups), writes your .env file, creates every table, seeds your settings, your administrator account and a default category, then marks the install complete. The welcome post ships with a cover image; with sample content left on the site looks complete from the first minute, and with it off the site starts empty - the first post is yours to write.
A WordPress migration continues from here in time-budgeted chunks with a live progress bar. Closing the tab is safe: reopen the wizard and it offers to resume where it left off. Same-server migrations use a disk shortcut for media, which is why a 1,200-post site with 600 comments and its images typically lands in well under a minute.
5. Done
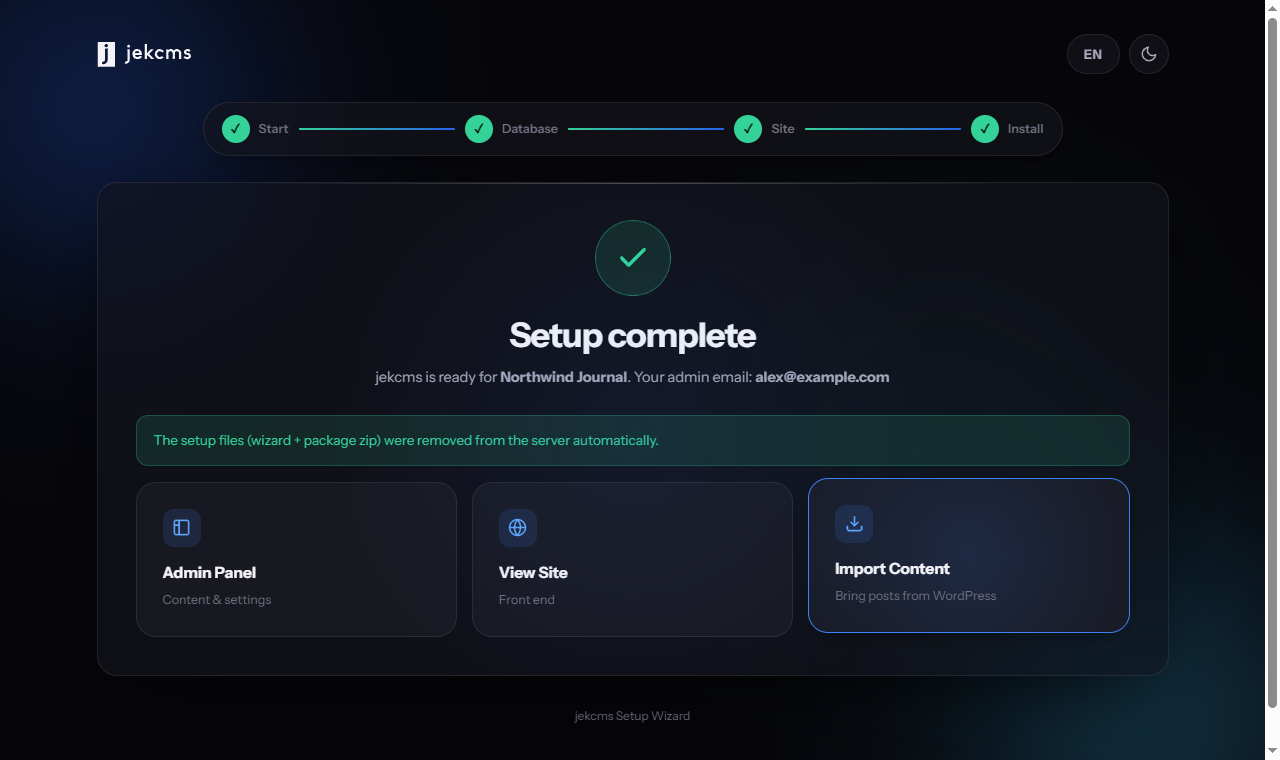
On this screen the installer deletes jekcms.zip and then deletes itself. Nothing is left in your web root for an attacker to re-run - there is no install.php to remember to remove.
Follow Admin Panel and log in with the account you just created.
What the installer wrote
.envin your web root - database credentials and site URL. On a production host, a copy is written to.env-production.config/.installed- the marker that tells jekcms it's live, and tells the wizard not to run again..htaccess- jekcms's own rewrite rules. If you installed over an existing WordPress site, its.htaccess(typically full of Yoast or Rank Math rules that would break jekcms's clean URLs) is preserved as.htaccess.wp-backupbefore being replaced.
Your first ten minutes
Log in at /admin. The dashboard opens with a five-step first-publish track across the top; it checks each step against the database on every load, so it stays honest no matter which page you finish the work on.
- Site identity - name and tagline under Settings → General, default meta description under Settings → SEO.
- Logo - Settings → General, if you skipped it in the wizard.
- Your first category - Categories. The seeded "Uncategorized" doesn't count.
- Your first post - Posts → Add New.
- A strong admin password - Profile.
When all five are green the track disappears on its own. From there, customize your theme and connect your integrations.
Common installation problems
"Could not open jekcms.zip." The upload was interrupted and the file is truncated. Re-upload it - FTP clients are the usual culprit, so prefer your host's file manager for the zip.
"Files could not be extracted." Your web root isn't writable. Set the folder to 755 in your hosting file manager and re-run the wizard.
"Database connection failed." Nine times out of ten it's the database name. If your host prefixes it (cpuser_jekcms), the prefix is part of the name.
"wp_..." table was not found during a migration. Your WordPress table prefix isn't wp_. Open wp-config.php and read the $table_prefix line.
A 500 error on the first page load. Almost always mod_rewrite. Confirm .htaccess survived the upload and that your Apache config sets AllowOverride All for the document root.
Admin login loops back to the login page. Session cookies aren't being stored - usually a trailing-slash mismatch in the site URL, or an unwritable PHP session directory.
Images won't upload. uploads/ needs to be writable: 0755 on the directory, 0644 on the files inside.